Saturday, July 21, 2018

6'8" Super Fish is Done.

I've been waiting for a chance to get all the little things done.  The vent port got installed and the board was pressure tested.  No problems there.


My next step was to sand the board and fins with 120 grit.  After that I start wet sanding with 220 grit and finally 320 grit.  I do all my sanding by hand.  More Mana for this one.  The last thing I do is apply Dolphin Skin.


I'm satisfied with the way this board turned out.  I did the quad fin cluster set-up a little tighter than the copy board.  It's just a little thing that I happen to like.


I'm glad it's done.  It will be stored indoors in my Florida Room waiting for a good hurricane swell.  


My dog Luke will be keeping an eye on it for me.  Thanks for your support.


Sunday, July 8, 2018

Wrapping it up.

The last big thing to do is the bottom fill and hot coat.  It's like doing the top.  I start by sanding the laps and any high spots.  Then I tape off the rails.


For the bottom it only takes about 12 oz. of resin to do a fill coat.  I apply that and let it level itself out for about 10 minutes.  Next I cure it.


After it's cured I sand the bottom and fins with 100 grit.  It takes about the same amount of resin for the hot coat.


This is how it looks after it's cured.  I still have a lot of wet sanding to do.


I'm happy with how the fins and board are turning out.  It's best to let the resin cure for a couple days before doing my wet sanding.


Thanks for your support.  Keep surfing.

Saturday, July 7, 2018

Filler and hot coat.

My last post was about an issue I was having with laminating the fins.  This time it worked out and I was able to get a good bond between the wood and the glass.  I laid up 3 full layers of S2 glass and 2 half layers.


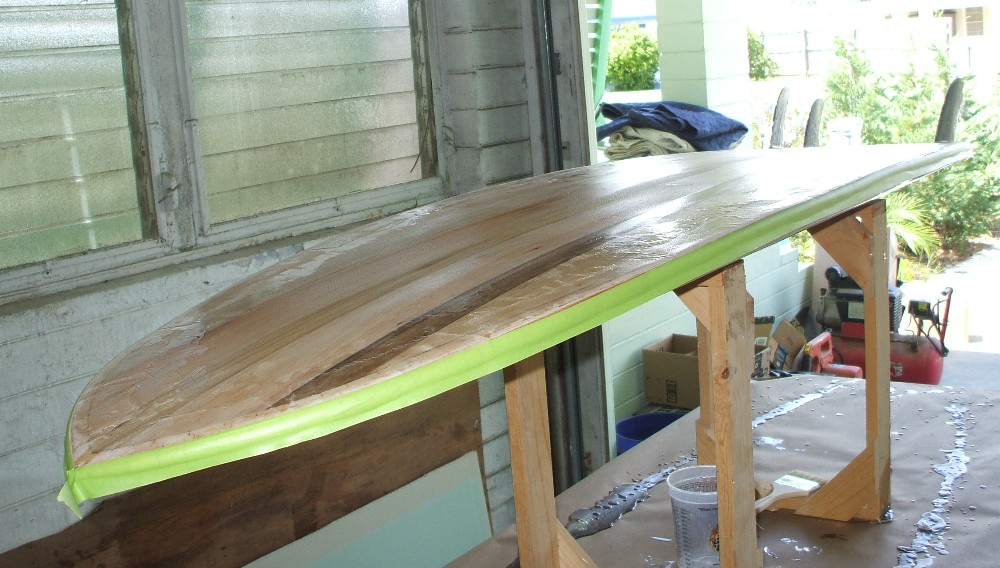
Today my plan is to do the filler and hot coat on the top.  It takes some prep work to set it up.  I sand any high spots and try to blend as much as possible.


I tape off the bottom edge with green tape.


I make a little breather tube so the board can breathe.


For my fill coat I need a brush, spreader, calibrated cup, respirator, resin and gloves.


When I do my filler and hot coats I use a method similar to the one in this link.  Filler coat and hot coat
As soon as I'm satisfied with the coating.  I take it out and cure it.


This is where I differ from the video.  I sand the board again with 100 grit and remove any high spots.


I rinse the board and tape off the bottom again.  Now I apply another 14 oz. of Suncure.


After I apply this coat I let it set out of the sun for 15 minutes.  Then it gets cured.  I'm pretty happy with the outcome so far.


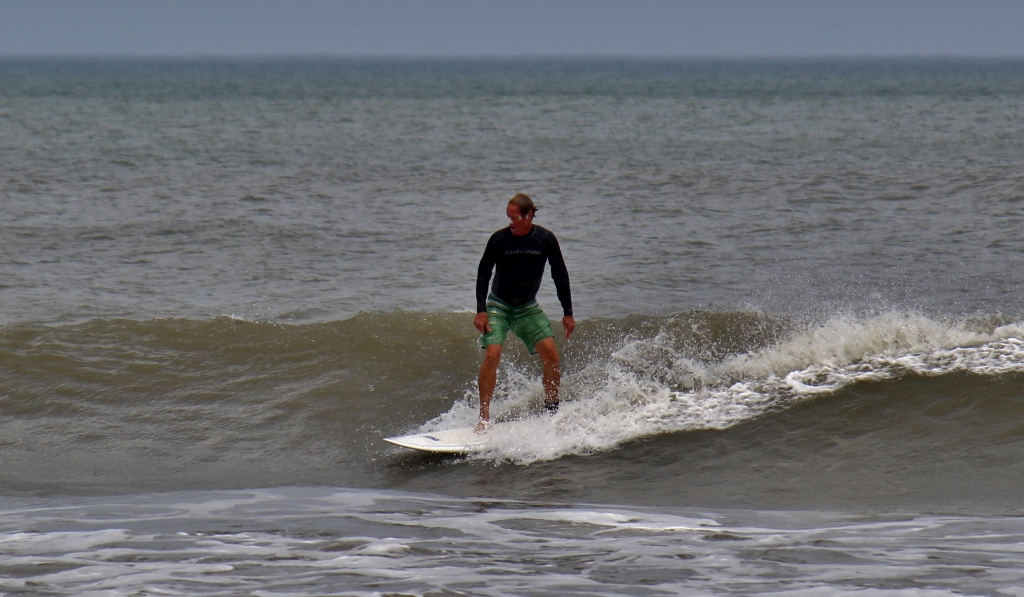
We have been having some fun small surf for a while now.  There is hurricane Beryl headed this way.  That's great news.  Thanks for your support.


Sunday, July 1, 2018

It just might work.

When it comes to any of my projects.  I like it when everything goes as planned.  After exchanging ideas with my fin maker I learned something.  Don't make things harder than they have to be.  He recommended that I clean the fins.


I did that with xylene.  That removed any of the surface oils.  I used some masking tape to remove any little pieces of cotton from the cotton balls.  


My next step was to apply a layer of Suncure sanding resin.  The wood soaked it up.


The Bloodwood is very dark and a good contrast color.  I let the resin cure and sanded the fins with 100 grit.


My next step was to make a batch of laminating resin.  I added a single layer of glass to the fins to see if it was going to work out better this time.


The glass went on smooth.  This just might work out after all.  I hope so.  I'll know tomorrow.


Friday, June 29, 2018

OOphs watch out for the Bloodwood.

We finally had a little break from the summer flatness.  Nice little knee to waist high nuggets for the past 3 days.  Fun stuff and the water cooled down.


My project took an unexpected detour today.  I glassed the fins in yesterday.  That went alright.  Today I was cleaning them up for some more glass.  That's when I noticed the polyester resin didn't bond with the fins.  I pulled at it and the glass didn't stick good.


The fins are Bloodwood and something else.  It's a bummer that I didn't expect.  My next step is to carefully cut these off.  I've been working with polyester resins for a long time.  This is a first time anything like this has happen.


Lesson learned on this post.  Stay positive and get in the water.  Thanks for your support.

Wednesday, June 20, 2018

6'8" WL Superfish gets laminated.

It's been usually dry for the past few days.  That's better for glassing.  I want to give a shout out to the good people at  Fiberglass Supply .  They have been providing me with fiberglass for many years.  Good prices and fast delivery.


When I glass a board I always do the bottom first.  I also wrap the rails for additional strength.  The S2 fiberglass is a little more difficult to work with than the regular E glass.  I like the S2 because it's much stronger.


Glassing is a lot of fun for me.  I like to wrap it tight and remove excess resin to keep it light.  Once the bottom is done.  I sand the laps and glass the top.


That get wrapped too.  I used Suncure laminating resin for this board.  It's really nice to work with and sets up fast when you expose it to UV.


I'm happy with the results.  My next step is to glass on the fins.  My girlfriend Julie did a beautiful painting of me surfing.  She is super talented.


I would like to thank all the people that visit my blog.  It's amazing to me how many follow it.  There are people from all over the world.  I hope it helps them with their projects.  Thanks for your support.

Friday, June 1, 2018

6'8" WL Superfish ready for glass.

The rails are shaped and the board is sanded.  My next step is glass it. 


The board is light and feels strong.


The measurements match the copy board.


Today is the start of Hurricane Season.  My favorite time of the year.  The water is warm and the potential for some fun waves.


Thanks for your support.

Sunday, May 27, 2018

Hurricane Season and rail strips.

The weather is starting to become more active.  Tropical Storm Alberto is making waves in the gulf.  That's making local panhandle surfers happy.  For the east coasters it's making a lot of rain.


Yesterday, I sanded and planed.  The way I lay up my rail strips is very time consuming.  I like to take my time.


This board seems to be working out well so far.  It's a pleasure to work with balsa and paulownia.  Sanding these woods is so easy.


It's taken a while to get the board to this point.  I did a new nose detail that makes this one special.  I'm still figuring out new things to try.


The board is ready to have the rails shaped.  I love to do this part.  For this I use a block plane, modeler's plane and sanding board.  Power tools aren't needed.


Thanks for your support.

Tuesday, May 1, 2018

Skinned and rough shaped.

The way I build my boards I'm never sure of what to expect.  It's only after I take it out the cradle and trim the skin that I know what I got.  This is just the beginning stages of shaping.


I weighted the board.  It came in at 6.75 lbs.  That's good so far.  I still need to add rails, leash plug and glass.  I hope that it turns out lighter than the copy board.  A little trick I've been doing is cut a 1/8" thick section out of the nose.  Then, I reglue it.  That makes it just a little thinner which is what I want.


On my boards I like the noses and tails thin like regular surfboards.  When a board has a thick nose and/or tail.  That thickness gives the surfer less feedback on how the board feels.  In surfing it's very important to have equipment that helps and not hinders.


Friday, April 20, 2018

Outside stringers and pattern making.

The outside stringers firm up the frame.  I run mine the whole length of the board and trim them back as needed.


Once those are installed the next step is make the patterns for the nose and tail.  To do that I trace nose and tail from the copy board.


Making the nose and tail sections is a lot easier when you have the copy board.  I trim down the outside stringers length and height.  I also added some transition pieces.


My next step is level all the upper stringers to make a smooth transitions from tail to nose.